To open the Real Time MC Link Editor, right-click on the project in the project tree, go to "Add Object" and then click on "Real Time MC Link Editor..."

Once opened and the correct network interface adapter selected, any connected drives should be displayed in the window as shown in the diagram below:
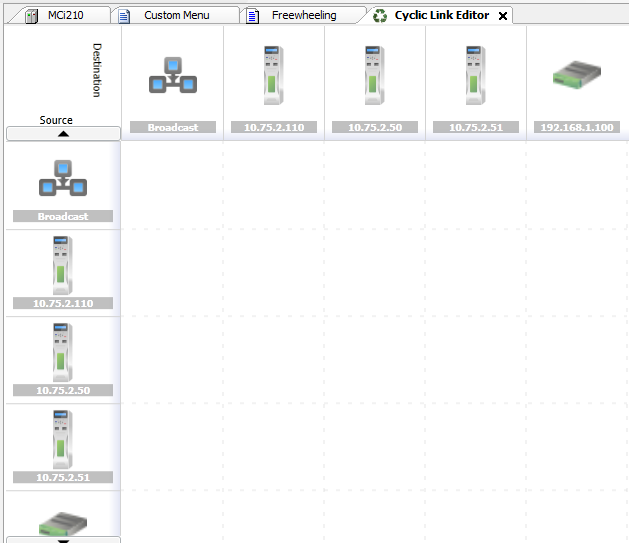
To create a cyclic link between 2 drives (a Unicast link), double click on the appropriate square for the link. The source nodes are displayed vertically on the left hand side and the destination nodes are displayed horizontally across the top.
Double clicking on the appropriate square will bring up the link create view. From this window, all properties of the cyclic link can be set up. For example, the transmit rate, if the link is to be synchronised, the parameter mappings, timeout actions and late data handler actions.
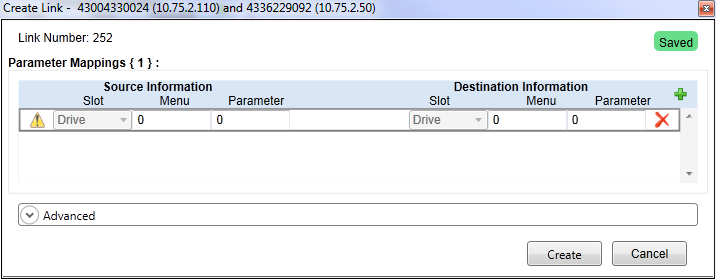
Once all the required properties have been set up, click on the Create button to create the links between the two drives.
Once the link has been successfully created, the Cyclic link editor will then refresh automatically to include the new link that has been created.
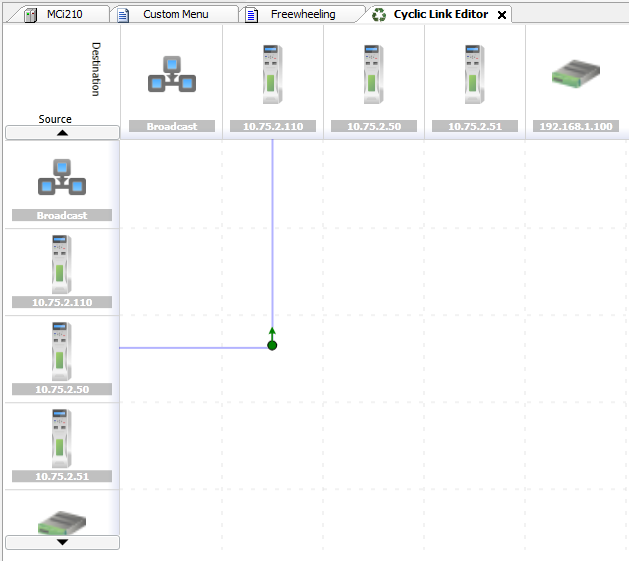
To create a cyclic link between a drive and multiple drives (a Broadcast or Multicast link), double click on a square where the source node is a drive and the destination is broadcast (the satellite dish image).
This will then open up the Create Link view, but will also contain information about destination IP addresses as shown below:
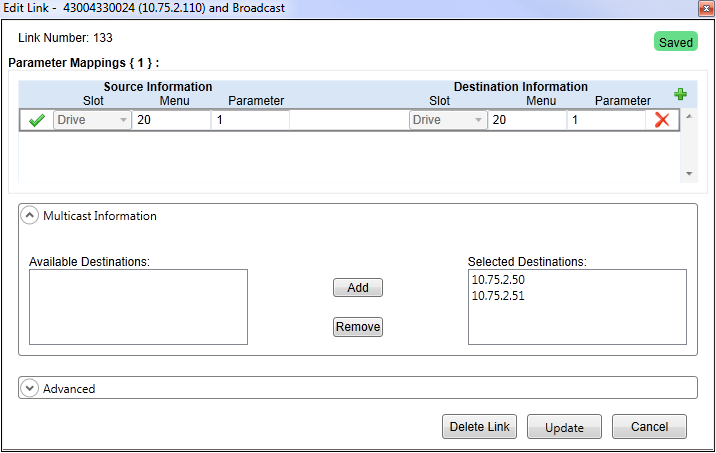
The main difference between this and creating a Unicast link is that in the Multicast Information box, the editor gives the possibility of selecting specific nodes as destinations.
Once all the properties of the link are correct, click Create and the Cyclic Link editor will then include the new link as shown in the image below:
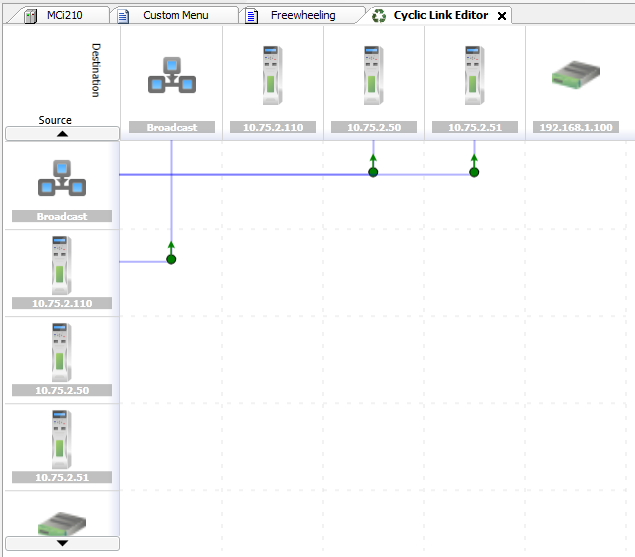
To delete a link, double click on the appropriate box where the link is present. This will open up the Edit Link view. From this view, click on the delete link button and this will delete both the transmit and receive link that is present for this link number.
Once deleted, the Cyclic Link editor will refresh indicating that the link has been successfully deleted.